Part Four- Things Start to Come Together
Blimey, has another month gone already? Time flies when you’re having fun. I think I’ll go all Hollywood for the start of this month’s article. (- cue deep, manly voice) Previously on Confessions of a First Time Restorer – the speedo had been restored, the engine casings were being vapour blasted, the petrol tank was in to be treated, the wheels had been restored, a painter had been chosen, the frame had been powder coated, I had started some DIY painting on small bits, the chrome had gone in and most importantly, I had survived my heater confession.
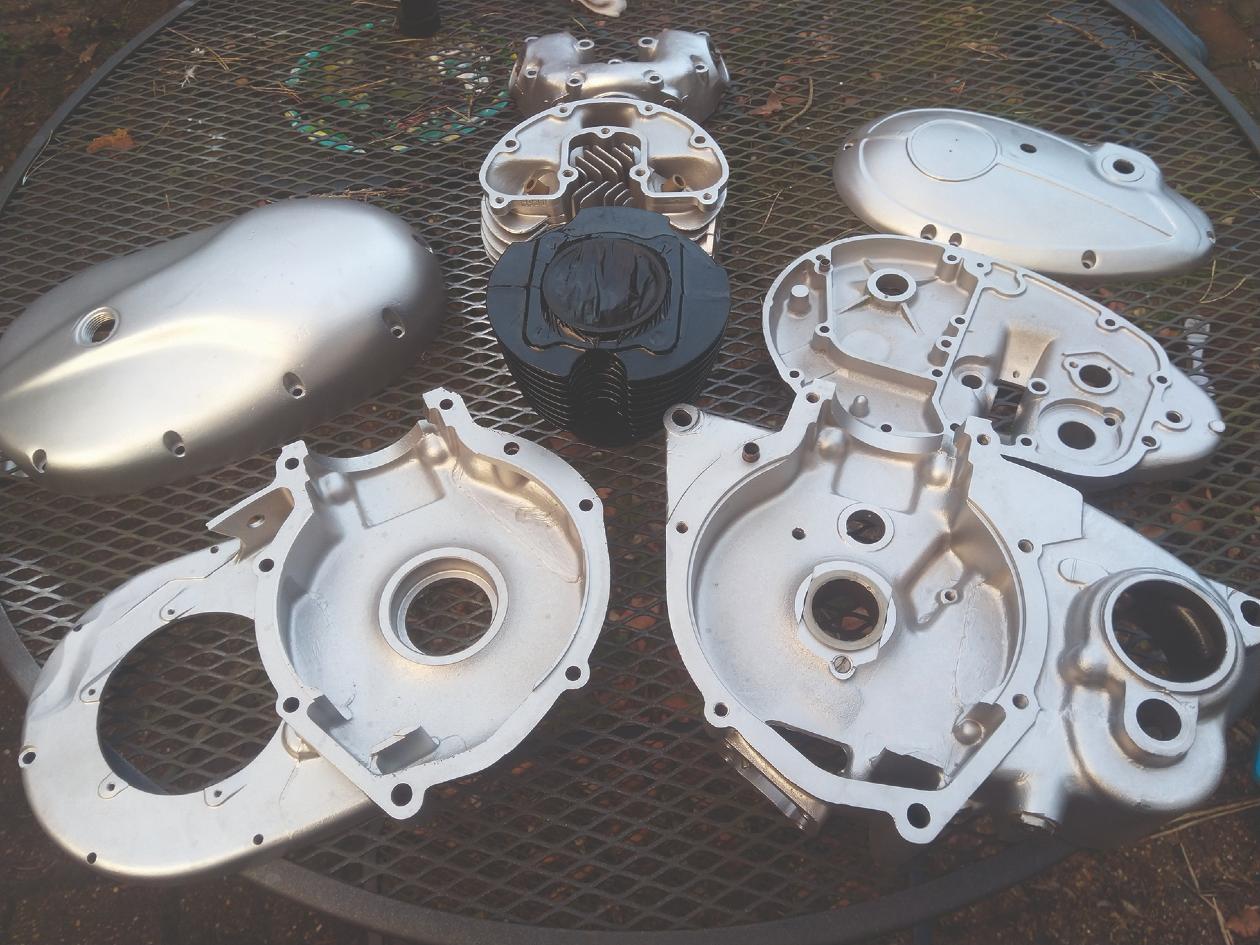
The month got off to a good start as I collected the engine casings from RD Cox in Reading and the beautifully treated petrol tank from Jeep in Waterlooville. There had been a delay on the engine casings as one of Doug’s people was off work with Covid. Thankfully, they made a full recovery and I was able to collect the engine parts on the 2nd. Getting these back was key to progress. I couldn’t start on the frame as I needed the chrome back to be able to do that. The first parts required on the frame both had chrome components. With hindsight I should have got the chrome in earlier, but there we go. Getting the engine casings back did mean that I could start on the engine though. And they looked great. What a difference to before.

Starting on the engine did worry me, and to be honest, this worry won’t go away until I can ride the bike without it grinding noisily to an expensive halt. I might think that I’ve done it correctly and I may think that all the various components are in good working order, but I don’t know for sure. I don’t have that knowledge or experience yet, although it is amazing the amount I have learned. Will it work? Time will tell. I have no doubt there will be teething problems, but that is to be expected. I continue to study the books, learn from videos, get great advice off people online, and Dave and Lisa (Rupert Ratio) are kind enough to help me out every time I ask for help. But advice can only be as good as the questions asked. Ask a question on Facebook and you are guaranteed to get at least three different answers. Am I asking the right questions and getting the right answers? I guess these are the normal doubts of someone who is trying something for the first time so outside their skillset.
A great, and massively frustrating (embarrassing?) example of this has been my nemesis of the month, the tubes and tyres. I thought this would be simple. I’d been putting tubes and tyres on bicycles since I was a kid. I’d also watched some YouTube videos just to be sure. How hard could it be? The answer? Very when your name is Jon Case. On my first attempt I put the tubes and tyres on and eagerly pumped them up. Nothing! No air appeared to be going in. Eh? Valve faults, pump faults, twists in the tube. All investigated and discounted. I took everything apart and realised that I had managed to puncture both tubes putting them on. Not small holes either. Plonker! So new tubes were ordered. Take 2, being a lot more careful this time I tried again. I even wore gloves. Both appeared to have been a success, until the next morning when the front was flat again. Somehow I had managed to puncture the front tube again. I probably pinched the tube with the tyre spoons. This time the hole was much smaller though, so I decided to use a puncture repair kit until I was happy I could do it properly. I would then put in a new tube. Take 3, on it went again and it stayed up this time. However I did notice that the bead was not sitting evenly around the rim. More investigation. Takes 4, 5, 6 etc, etc, over inflation, tyre soap, silicon lubricant, bouncing. Letting it down and re-inflating repeatedly. All done to no effect. Meditation to stop throwing a complete tantrum, perfected. I have now inserted a new tube and am going to take it down to Andy at Dynotech in Bramley for some help. The white flag has well and truly been waved on this. I’m assembling an engine but can’t put a tyre tube in! As I said, embarrassing.
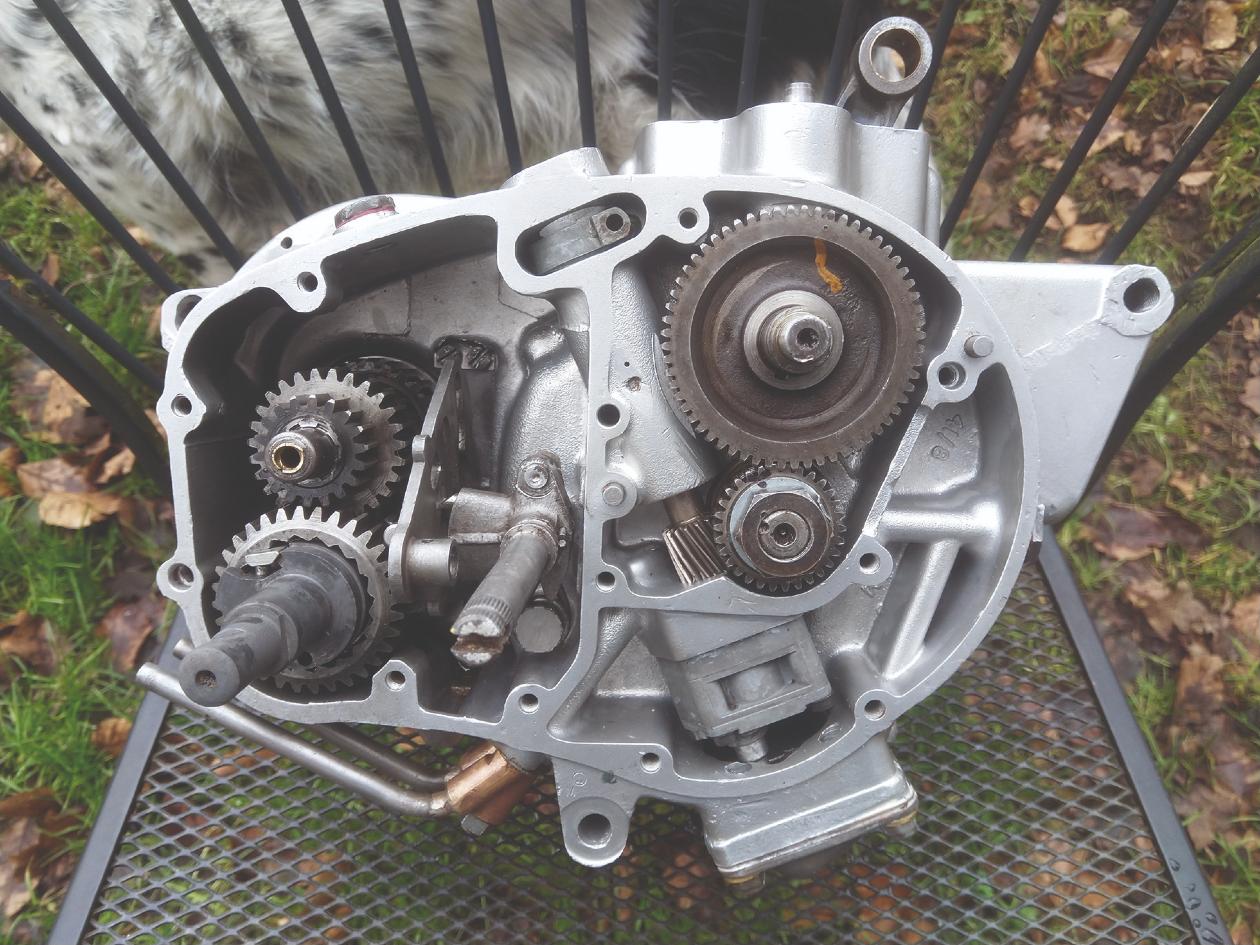
Back to the engine though. An important part of the process was cleaning out the sludge trap. This removed all old particles of muck and debris that had accumulated in the depths of the engine. You may also remember that I got a new crank sleeve – (from Austria of all places)? I had to get this fitted before I could put the crankcase halves together. This was a loose fit, whereas I had to battle to remove the original it was so tight. So, on advice from Mr. R I used Loctite to fix it in place. I could then put the crankcase halves together but trying this highlighted another issue that I had not considered. The bush that this sleeve went into was now too small for the new sleeve. Upon investigation I discovered that this meant I needed to do some ‘reaming’. I’d read that word lots of times but didn’t have a clue what it meant. For those with my level of knowledge it means increasing the internal diameter of an object so that another object will fit into it snugly. For engines, the objects going into the bush need to be an exact and very snug fit so that rotation within the bush can occur but there is no unwanted lateral movement.
Now this needed equipment that I did not have access to (I have found some proper tools since) lateral thinking time again. I came up with a method that I think will work. Again, time will tell. If I’m wrong it’s going mean a lot more work. Basically, I horizontally secured my drill in place and used an abrasive attachment on the drill to carefully increase the internal diameter of the bushes. I did this very slowly, one circuit of the bush at a time so not to go wrong. I then polished the bronze so it was smooth. They fit snugly, rotate very nicely and there is no give in them. Back to that worry part. I think it is okay, but don’t know for sure yet. There are potentially many people out there shaking their heads in disgust.
Doing this reaming allowed me to put the crankcase halves together and start work on the timing side of the engine. I have previously mentioned that the distributor drive shaft and drive pinion both had teeth missing. I now believe this was because the drive shaft bush had not been inserted correctly allowing the shaft to move up and down instead of staying vertically in position and resultantly break against the pinion. I needed new of both. They also needed to be a matched pair. I found the shaft in the Netherlands but couldn’t find the pinion anywhere. As for a matched pair, nothing! I also came up with two part numbers for the shaft. Mr R to the rescue again. He told me that upgraded shafts and pinions had been introduced in 1960 because of excessive wear and tear, hence the two part numbers old and new. He also said that he had a matched pair he could sell me. Result! Ordered and installed. Then came the oil pump, sump plate and the trickiness of the gears, camplate and quadrant, etc. I think I have put the gears in as per the books and schematics, but my gut tells me they are not quite right yet. I’m hoping Jim Bates will be able to come over next month as we start to exit lockdown. I’m going to ruthlessly use his knowledge and see what he thinks. It may well involve some disassembly but so be it.
The next part was the engine casings which needed to be vapour blasted. Recommendations on BSA Facebook groups led me to RD Cox in Reading. For the petrol and oil tanks, Andy Kennett at Dynotech in Bramley (where I take my Yamaha), recommended a gentleman called Jeep in Waterlooville. Only the petrol tank needed work, the oil tank is fine – some money saved! The shiny bits have gone off to AK Moto in Goring – more on that in a sec. Small privately-owned businesses whose work is their calling card and their future business, apart from Jeep, who I assume does it as a hobby during his retirement. I am eagerly anticipating the return of all these items as I will then be able to start re-assembly.
I had another ‘spreadsheet’ moment when it came to the chrome parts. I was quite shocked when I got the quote through. It was significantly more than I expected. Some parts were excellent value, others way more than I thought. It was actually cheaper to buy new for several parts. This was disappointing as it would have been nice to use the original parts, but sense had to prevail – first time for everything.
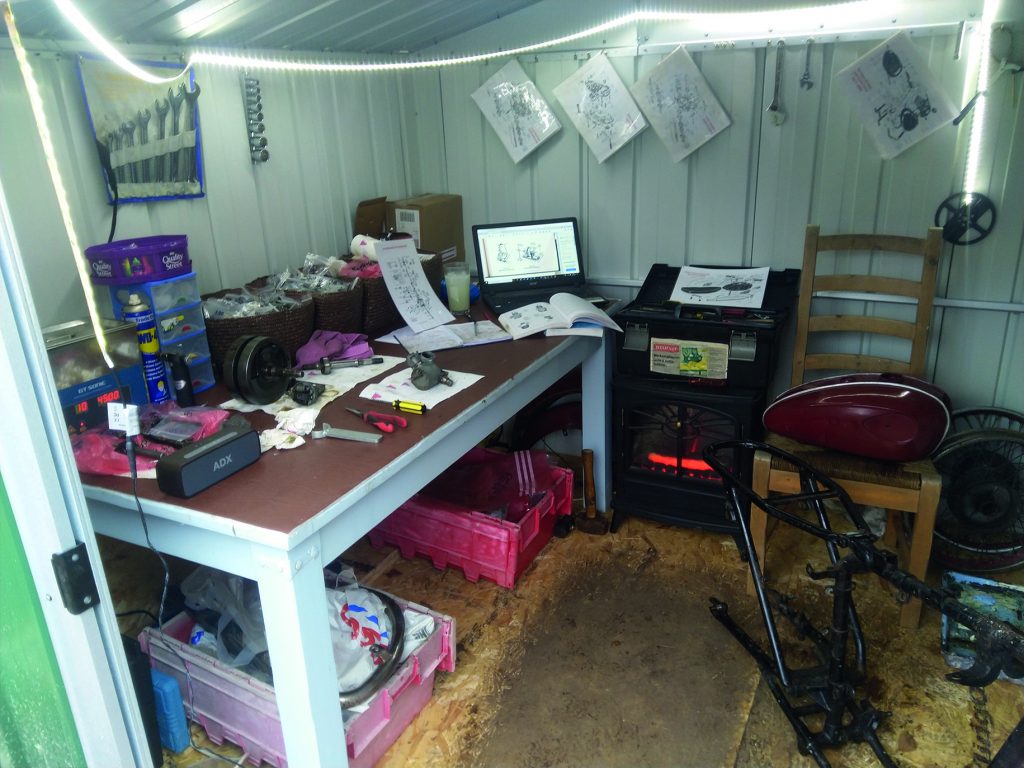
You’ll note from the background of the photo that I have gained an assistant, Murphy one of our dogs. He has taken to lying outside the shed keeping me company. Nothing to do with the supply of dog treats I have in the shed. I get regular nudges reminding me it is time for his next treat. Usually at a particularly trick moment of course.
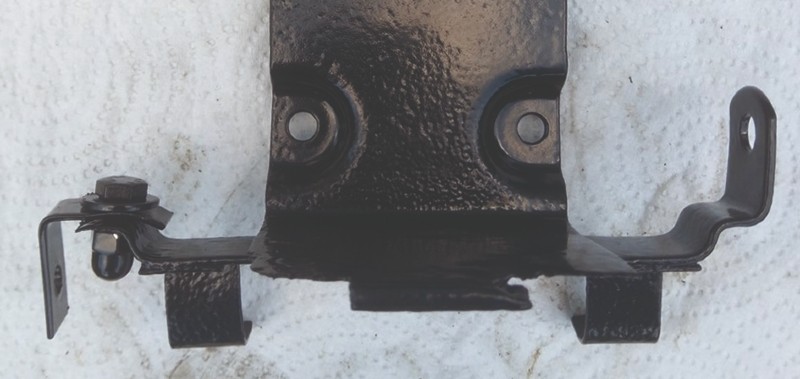
The other things that have been completed this month are my painting of parts that I could not get powder coated. I did numerous layers of primer and plenty of coats of black. They have come out looking lovely. I have also repaired the battery holder which had an arm missing. It would have been nice to have welded another arm on, but, once again I do not have access to that type of equipment and improvised. I did coat and spray the parts I used, so I am pleased with the result.
So the timing side was in place and it was time to get the outer timing cover on. Gasket goo done and cover on. When I first started reassembling I had decided to print out copies of the schematics so that I could tick off each part as it went back in or on. There were various reasons for doing this. Not only did it mean that I was assembling in the correct order, but it also meant I could ensure I used all parts I had taken off. And alert me to missing parts. The only problem being when the piece you’re scratching your head over is on a different schematic to the one you would expect and is meant to be on the other side of the cover you’ve just gooed into place! Darn. Cover off, goo cleaned off, part inserted, goo reapplied and cover reinstalled. Annoying, but it immediately proved the worth of the system.
This was as far as I wanted to go on the engine without it being in the frame. As mentioned, I couldn’t put the engine back in the frame until I had a rolling chassis (due to bits of the engine protruding outside of the frame). And I couldn’t have a rolling chassis until I got the chrome back. I am stuck until I get the chrome back, which is not only taking longer than I anticipated it has also had an additional delay.
Only one more thing I could potentially do this month. As I had the petrol tank back from Jeep, I could get the tinware to Mike at Triple C if he was ready for it. He was, so it has gone in. There will be some additional work to the front mudguard though, as when I picked it up (correctly, I hasten to add) to take it in one of the stays just snapped off. I was quite annoyed until I realised that this was probably the ideal time for this to happen if it had to.
So on the last weekend in February I ground to a halt. I still couldn’t start on the frame and I didn’t want to do any more to the engine. I was assured that I would be able to collect the chrome a week and a half later. We’ll see.
To that end I’m signing off until the next instalment. I have plenty of non-motorbike things that need catching up on now lockdown measures are going to be easing. I will try to get some bike stuff done but can’t guarantee it.
I hope you are getting your jab dates through. Maybe we’ll have a St. Crispin’s Sunday before too long?
Jon Case
First published in Slipstream April 2021